#!/bin/bash
#NDK=/work/NDK/android-ndk-r18b
NDK=/work/NDK/android-ndk-r10e
function build_android
./configure \
--prefix=$PREFIX \
--enable-static \
--cross-prefix=$CROSS_PREFIX \
--sysroot=$SYSROOT \
--enable-pic \
--extra-cflags="-fPIC -fpic" \
--extra-ldflags=" -fPIE -pie" \
--host=aarch64-linux-android
if [ $? != 0 ];
echo -e "\033[31mErr! get the detail message in config.log \033[0m"
exit 0
make clean
make -j8
make install
#------------arm64----------------
#SYSROOT=$NDK/sysroot //ndk18
SYSROOT=$NDK/platforms/android-21/arch-arm64
CROSS_PREFIX=$NDK/toolchains/aarch64-linux-android-4.9/prebuilt/linux-x86_64/bin/aarch64-linux-android-
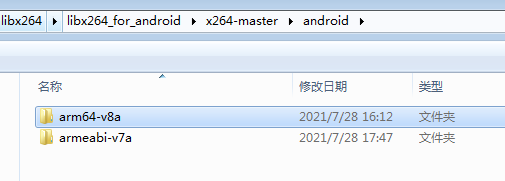
PREFIX=$(pwd)/android/arm64-v8a
##------------arm--------------
#SYSROOT=$NDK/platforms/android-21/arch-arm
#CROSS_PREFIX=$NDK/toolchains/arm-linux-androideabi-4.9/prebuilt/linux-x86_64/bin/arm-linux-androideabi-
#PREFIX=$(pwd)/android/armeabi-v7a
#----其他的可以参考对应NDK下的目录路径即可
build_android
三:
问题1:编译libx264主要是ffmpeg需要,但是和编译ffmpeg不同,当前的libx264库提供的 configure竟然是没有配置使用clang 编译器,执行#./configure --help可以看到,可以设置--cross-prefix 交叉编译选项,没有-cc -cxx 的选项,添加上-cc -cxx的配置会报错,不添加的话, configure 里面默认使用的 CROSS_PREFIX-gcc 进行编译,最新的ndk (21) 已经抛弃了gcc, 没有gcc这个工具了,所以configure直接就会 cc test err,找不到编译器。
三种方法:
1.0 手动修改libx264 里面的configure, 让其像ffmpeg一样可以单独配置 -cc -cxx。 (weinan)
2.0 在网上看到有些做法是,export CC=xx-clang export CXX=xx-clang++
configure 脚本没有提供配置的接口,这里通过export 导出变量到当前shell 环境中,这种方法设置 编译器
3.0 既然libx264默认使用gcc, 就换一个支持gcc的ndk吧。
这里碰到一个坑,下载了android-ndk-r18b ,虽然这个ndk里面确实找到了 gcc, 但是这个交叉编译器工具链的gcc 有毛病,编译可以,连接就默认用到ubuntu 系统自身的 /usr/bin/ld 工具了,很是坑:
写个main空函数文件用它gcc 交叉编译一下都会报连接错误:
#android-ndk-r18b/toolchains/aarch64-linux-android-4.9/prebuilt/linux-x86_64/bin$ aarch64-linux-android-gcc my_test.c
/usr/bin/ld: unrecognised emulation mode: aarch64linux
Supported emulations: elf_x86_64 elf32_x86_64 elf_i386 elf_iamcu i386linux elf_l1om elf_k1om i386pep i386pe
clang: error: linker command failed with exit code 1 (use -v to see invocation)
所以这里干脆找了个 老版本的ndk:
Android NDK, Revision 10e (May 2015)
编译OK
问题2:编译出来的 x264 无法在设备上运行:
 在连接的时候加上参数 -fPIE -pie 即可。
问题3: 添加上 -pie 之后,编译报错,undefined reference to 'main'

这是编译动态库 时添加了参数-pie (位置无关码)造成的问题(本篇把--enable-shared 配置项去掉了,只编译静态库),本来加这个参数是给 编译x264可执行程序使用的。 去掉这个 -pie参数,即可,或者单独修改configure之后的makefile, 只对 编译x264可执行文件的编译项添加 -pie参数:
x264$(EXE): $(GENERATED) .depend $(OBJCLI) $(CLI_LIBX264)
$(LD)$@ $(OBJCLI) $(CLI_LIBX264) $(LDFLAGSCLI) $(LDFLAGS) -pie
@u-xiancan:~/share_can/libx264/libx264_for_android/x264-master$ ./configure --help
Usage: ./configure [options]
Help:
-h, --help print this message
Standard options:
--prefix=PREFIX install architecture-independent files in PREFIX
[/usr/local]
--exec-prefix=EPREFIX install architecture-dependent files in EPREFIX
[PREFIX]
--bindir=DIR install binaries in DIR [EPREFIX/bin]
--libdir=DIR install libs in DIR [EPREFIX/lib]
--includedir=DIR install includes in DIR [PREFIX/include]
--extra-asflags=EASFLAGS add EASFLAGS to ASFLAGS
--extra-cflags=ECFLAGS add ECFLAGS to CFLAGS
--extra-ldflags=ELDFLAGS add ELDFLAGS to LDFLAGS
--extra-rcflags=ERCFLAGS add ERCFLAGS to RCFLAGS
Configuration options:
--disable-cli disable cli
--system-libx264 use system libx264 instead of internal
--enable-shared build shared library
--enable-static build static library
--disable-bashcompletion disable installation of bash-completion script
--enable-bashcompletion force installation of bash-completion script
--bashcompletionsdir=DIR install bash-completion script in DIR [auto]
--disable-opencl disable OpenCL features
--disable-gpl disable GPL-only features
--disable-thread disable multithreaded encoding
--disable-win32thread disable win32threads (windows only)
--disable-interlaced disable interlaced encoding support
--bit-depth=BIT_DEPTH set output bit depth (8, 10, all) [all]
--chroma-format=FORMAT output chroma format (400, 420, 422, 444, all) [all]
Advanced options:
--disable-asm disable platform-specific assembly optimizations
--enable-lto enable link-time optimization
--enable-debug add -g
--enable-gprof add -pg
--enable-strip add -s
--enable-pic build position-independent code
Cross-compilation:
--host=HOST build programs to run on HOST
--cross-prefix=PREFIX use PREFIX for compilation tools
--sysroot=SYSROOT root of cross-build tree
External library support:
--disable-avs disable avisynth support
--disable-swscale disable swscale support
--disable-lavf disable libavformat support
--disable-ffms disable ffmpegsource support
--disable-gpac disable gpac support
--disable-lsmash disable lsmash support
其他的一些配置选项:
--disable-asm disable platform-specific assembly optimizations
默认开启,对于不同平台可以进行指令级别的专项优化
--enable-pic build position-independent code
和上面添加的 -fpic 参数同样效果
问题4: configure 出错应该第一时间查看 config.log ,里面详细记录有日志,如果 出现如下错误:
cannot find crtbegin_dynamic.o: No such file or directory
......
cannot find -lc
......
cannot find -ldl
--sysroot 参数可能设置错误,在ndk目录中找一下这个 sysroot目录,或者直接找 包含 /usr/include 路径的目录,即交叉编译器的连接根目录。
ndk编译libx264,主要是ffmpeg需要,但是和编译ffmpeg不同,当前的libx264库提供的 configure竟然是没有配置使用clang 编译器,执行#./configure --help可以看到,可以设置--cross-prefix 交叉编译选项,没有-cc -cxx 的选项,添加上-cc -cxx的配置会报错,不添加的话, configure 里面默认使用的CROSS_PREFIX-gcc 进行编译,最新的ndk (21) 已经抛弃了gcc, 没有gcc这个工具了,所以conf...
结果发现居然提示我Read-Only filesystem,即使加上了sudo也没用
在我查阅相关资料后找到了解决办法(关闭SIP,然后输入sudo mount -uw /,创建文件夹添加权限,最后启用SIP),具体步骤如下:
1、重启mac,按住Command+R,等到系统进入安全模式。
2、选择一个账户,然后点击屏幕上方的工具栏找到命令行工具。
3、执行,命令 csrutil disable
1 解压:
tar xf gcc-linaro-5.3-2016.02-x86_64_arm-linux-gnueabihf.tar -C /opt/
2 修改交叉编译链权限:
chmod -Rf 777 /opt/gcc-linaro-5.3-2016.02-x86_64_arm-linux-gnueabihf/
3 修改/etc/profile,配置PATH。
export ARCH=arm
export CROSS_COMPILE=/opt/gcc-linaro-5.3-2016.02-x86
arm64位编译出错:aarch64-linux-android/bin\ld: unrecognized option '--fix-cortex-a53-843419' 的解决方法
报错信息:
ld: i386 architecture of input file `hello.o' is incompatible with i386:x86-64 output
解决方法:
命令行输入:>ld -m elf
WARNING: Source space `/home/xxx/src` does not yet exist.
其中,如下图,工作空间初始化路径为home/xxx,而不是catkin_ws
-------------------------------------------------------
reg add "HKEY_LOCAL_MACHINE\SYSTEM\CurrentControlSet\Control\usbflags\18D1D00D0100" /v "osvc" /t REG_BINARY /d "0000" /f
reg add "HKEY_LOCAL_MACHINE\SYSTEM\CurrentControlSet\Control\usbflags\18D1D00D0100" /v "SkipContainerIdQuery" /t REG_BINARY /d "01000.
因工程需要自己手动编译ffmpeg库,在编译过程中下载源码和libx264依赖库编译都踩了一些冤枉的大坑,花费了大量的时间,所以在此借此平台公开我已经踩完雷的一条平坦大道,以提升后来者效率。
编译过程:
一、源码下载:
建议不要在这里下载:https://ffmpeg.org/download.html
此处下载的源码名 ffmpeg-snapshot .tar.bz2实际编译完不可使用
在github上下源码就行,找不到的留言找我要
二、编译
1、使用libx264 需要安装,.
写这篇文章的目的是方便各位上网课的同学,能直接在windows上使用eclipse
编译调试lab的程序。之所以选择windows是因为虚拟机太卡,实验楼网站延迟高的不行,而且都很费眼睛。
首先我们下载eclipse
安装完后可以将其设为中文
eclipse中文设置
点击文件 - 新建 - Makefile Project with existing codes,直接导入一个lab实验
SQLCipher 是一种加密的 SQLite 数据库库,具有保护敏感数据的强大功能。NDK 编译 SQLCipher 的主要步骤包括以下几步:
1. 下载 SQLite 和 SQLCipher 的源代码。可以从这两个项目的官方网站上获取源代码。
2. 配置 Android NDK 的环境变量,并将 NDK 工具链添加到系统的 PATH 变量中。可以使用以下命令进行检查:
> $ ndk-build -v
如果出现错误,则需要重新检查环境变量和路径设置。
3. 执行 ndk-build 脚本,使用 NDK 工具链编译 SQLCipher 的源代码。编译后的库文件将会被生成到 libs/armeabi 文件夹下。
> $ cd /path/to/sqlcipher_source_code
> $ ndk-build
4. 将生成的库文件拷贝到你的 Android 项目目录的 libs/armeabi 文件夹下,然后在项目的 build.gradle 文件中添加以下代码块(假设你的库文件名为 libsqlcipher.so):
android {
sourceSets.main {
jniLibs.srcDirs = ['libs']
5. 在你的 Java 代码中使用 System.loadLibrary("sqlcipher"); 加载 SQLCipher 库。
以上就是使用 NDK 编译 SQLCipher 的主要步骤。需要注意的是,由于 SQLCipher 是一个加密库,所以在使用时需要遵循一些安全的实践。比如,你需要选择一个合适的加密算法和密钥长度,以确保你的数据得到足够的保护。
Android 移植iperf3.13 测试网络
To_be_a_fisher:


 在连接的时候加上参数 -fPIE -pie 即可。
