自己编写:
https://blog.csdn.net/weixin_42418774/article/details/107064255
element-ui upload 照片墙回显指定图片,隐藏上传按钮和显示上传按钮,选择图片与提交上传分开(先选择好了,点击确定再上传)
项目开发中要求最多只能上传3张图片,最后一张图片上传完成后隐藏上传按钮,解决方法如下:
代码示例:
<el-upload
 :class="{uoloadSty:showBtnImg,disUoloadSty:noneBtnImg}"  //设置隐藏显示的style
 :action="dealImgUrl"  //地址
 list-type="picture-card"
 :on-preview="handleImgPreview"  //点击图片放大
 :on-remove="handleImgRemove"    //移除
 :on-success="successImg"      //上传成功
 :before-upload="beforeUploadImg"
 :on-change="imgChange"
 :file-list="dealImgFileList"
 accept=".jpeg,.jpg,.gif,.png"
 :limit="3"   //限制个数
 <i class="el-icon-plus"></i>
</el-upload>
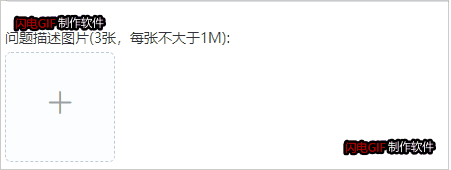
效果图如下:
1.动态绑定样式属性
:class="{uoloadSty:showBtnImg,disUoloadSty:noneBtnImg}"
data(){
return{
showBtnImg:true,
noneBtnImg:false,
limitCountImg:3 //上传图片的最大数量
style样式
<style>
.uoloadSty .el-upload--picture-card{
  width:110px;
  height:110px;
  line-height:110px;
.disUoloadSty .el-upload--picture-card{
  ;   /* 上传按钮隐藏 */
</style>
2.超过3张图片隐藏上传按钮,小于3张图片上传按钮显示
imgChange(file, fileList){
this.noneBtnImg = fileList.length >= this.limitCountImg;
删除图片时触发,在on-remove事件中判断图片数量
handleImgRemove(file,fileList){
this.noneBtnImg = fileList.length >= this.limitCountImg;
项目开发中要求最多只能上传3张图片,最后一张图片上传完成后隐藏上传按钮,解决方法如下:代码示例:<el-upload:class="{uoloadSty:showBtnImg,disUoloadSty:noneBtnImg}" //设置隐藏显示的style:action="dealImgUrl" //地址list-type="picture-card":on-preview="handleImgPreview" //点击图片放大:on-remove="handleI...
需求:用element-ui做后台管理,碰到使用图片上传修改和删除功能,刚开始想点击修改显示放一个img标签,但是和上传成功后的图片框样式不对,还不显示删除放大功能。
方案:查看文档发现,可以使用 file-list 绑定一个数组实现,具体如下
<template>
<el-table label="操作" width="200">
<template slot-scope="scope">
<el-button type
Christine0106:
微信扫描PC端二维码跳转到小程序确认登录通过WebSocket来获取用户信息达到PC端登录

